If you have been paying attention to my blogs (it’s okay if you haven’t),
you’ll recall that I wrote an article on
the basics of creating a sweep in
SOLIDWORKS. Since I’m sure you’ve mastered this, let’s move on to some more advanced
sweep feature functions. I will be focusing on the swept boss/base feature,
but this can also apply to a swept cut.
The first thing I want to focus on is the difference between Follow Path and
Keep normal constant. These are 2 of the Orientation/twist types under the
Options pane in the Properties Manager when creating your sweep. To summarize,
when the Follow Path option is used the profile will be normal to the path.
This means if you look at a cross section normal to the path anywhere, the
profile will be constant. In contrast, the Keep normal constant makes the
profile normal to itself. This can come in handy if you have something like
plastic tubing that’s profile can distort after you bend it.
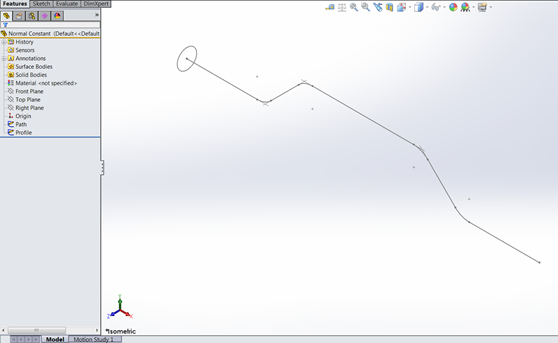
To illustrate this difference, here is a part with 2 sketches to create a
simple piece of pipe with a circular profile and a bent path:
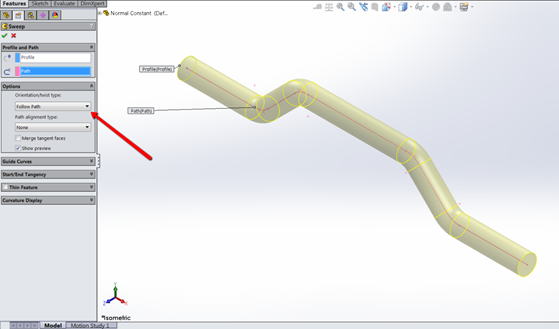
After going into the Swept Boss/Base feature (under the Features tab on the
Command Manager) and choosing the profile and the path, expand the Options
area to view the Orientation/twist type. The default is set to “Follow Path”,
so let’s see what that looks like when we hit the green check and create the
part:

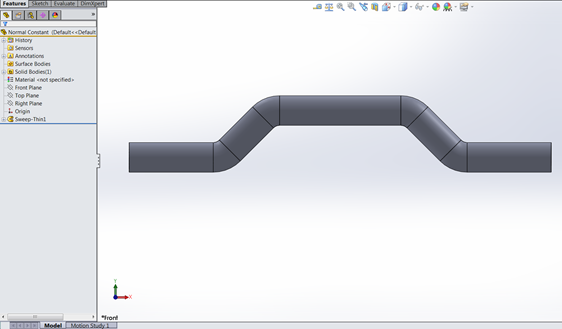
Part shown from the front view:
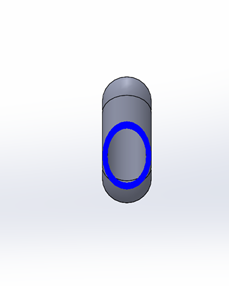
Here is the part shown sectioned at a diagonal leg. Notice how profile looks
like an ellipse, this is because the section cut is parallel to the same plane
as the profile:
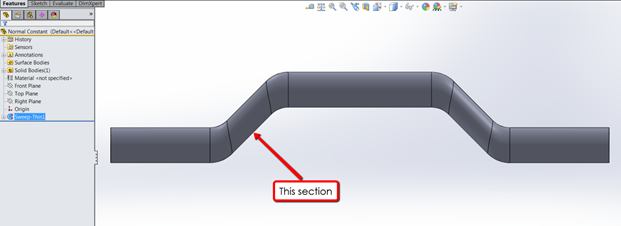
If we edit the feature, we can change the orientation to “Keep normal
constant”:
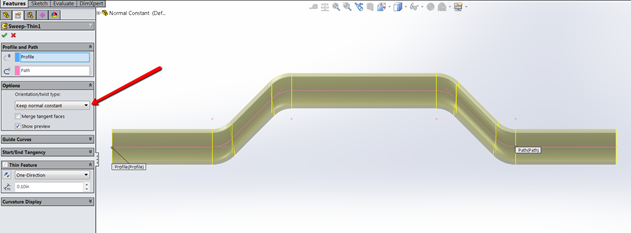
The diagonal section looks thinner instead of being a full round like before:
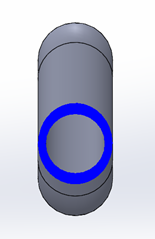
If we take the same section cut as before, the section looks round. This is
because the cut is parallel to the profile:
The second aspect I’m going to cover is using a guide curve to control the
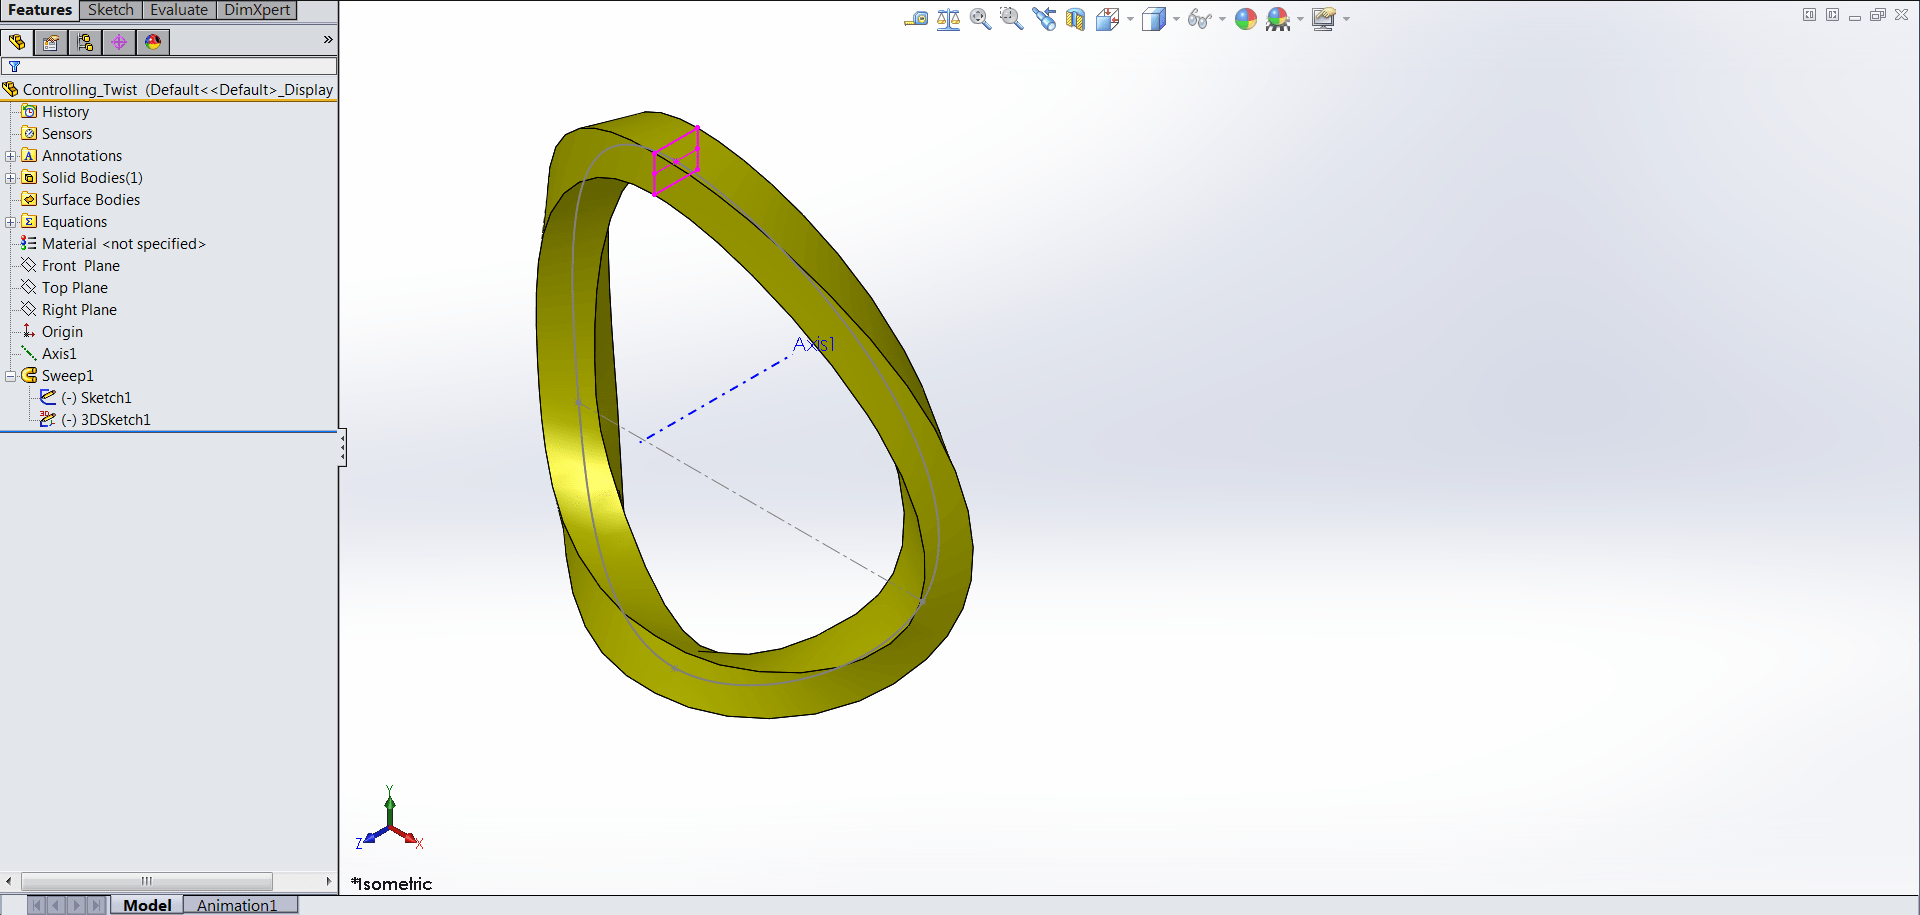
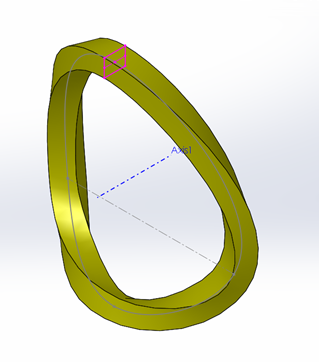
sweep. Here is a sweep that looks like a Mobius Strip (feel free to look this
up if high school math was a while ago like it was for me). The profile and
path sketches are shown, and this part was made with a rectangular profile
swept around a 3D sketch:
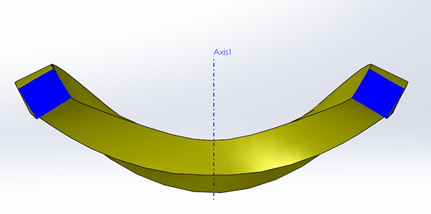
Taking a look at a section cut from the top view, notice that the profile of
the part is twisted in relation to Axis1. I want this profile to be
perpendicular to the Axis, so I’m going to create a new profile and use the 3D
sketch as a guide curve:
First, I’ll flatten the tree to see how the part was created sequentially by
holding [CTRL] and pressing [T]. Now I can use the roll back bar to go back to
the 3D sketch:
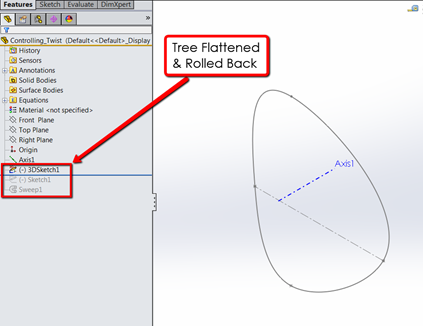
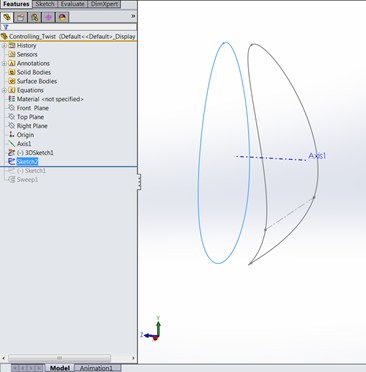
I’ll create a new sketch on the front plane and use Convert Entities on the 3D
sketch to get a 2D projection (Sketch2 is the new sketch). Sketch2 will become
the new path:
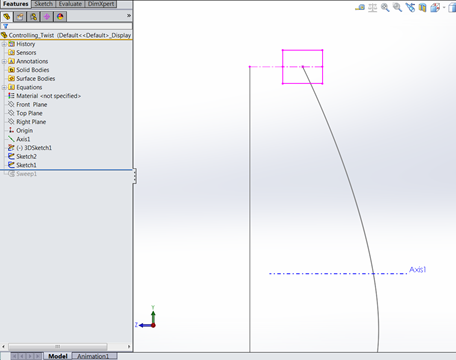
Now I will modify the profile sketch so that it relates to the new path by
adding a construction line that ties them together. Moving the rollback bar
down past Sketch1, I edit Sketch1, add the straight construction line and add
a pierce relation between the endpoint of the line and Sketch2:
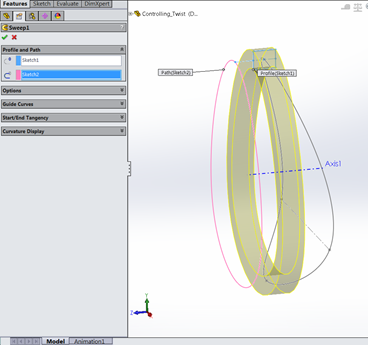
Now, edit the sweep and replace 3DSketch1 with Sketch 2. Looking at the
profile, the part looks like a flat piece and not curved as before, so we need
to add a guide curve:
Expand Guide Curves in the Property Manager. You can add in multiple curves to
control the shape, but in this case we will use the 3D sketch:
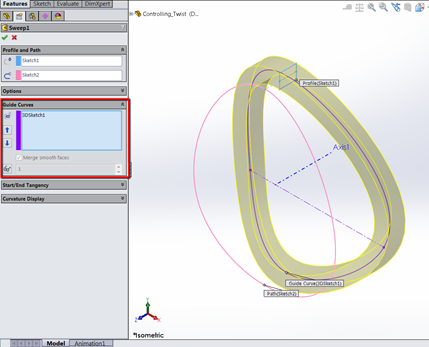
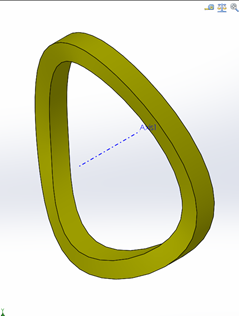
Now, the shape of the part looks similar, but if we take a look at the same
section cut as before, the profile is perpendicular to Axis1:
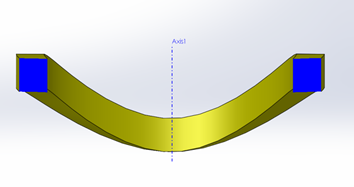
And voila, this is what I’m looking for! If you’d prefer to watch a video of
these steps, please check out our YouTube video. Happy sweeping and thanks for
reading!