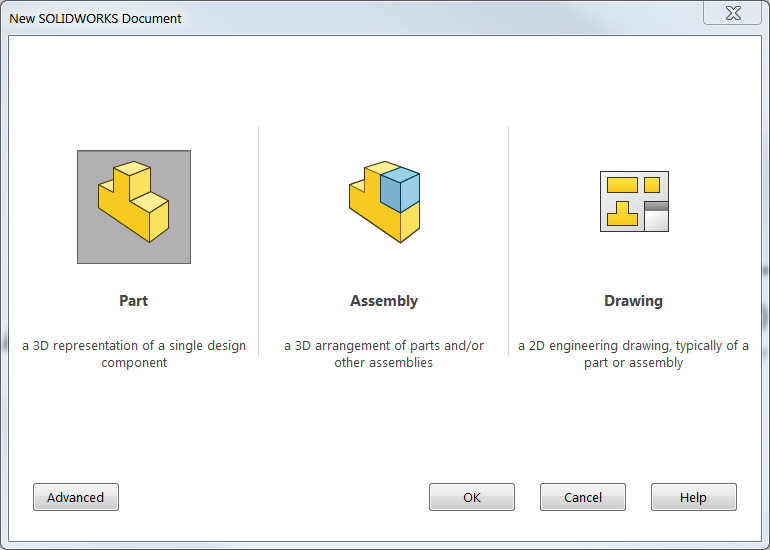
Have you ever wondered how to create and use your own custom templates in SOLIDWORKS? Or maybe you’ve created your own custom templates, but can’t figure out how to get SOLIDWORKS to show them as options when creating a new file? Well, this article is your solution to figuring out how to customize your own templates as well as have SOLIDWORKS give you the option of selecting them.
Templates allow you to begin new SOLIDWORKS projects with predefined document settings. These settings can include things like font sizes, units, drafting standards and dimension settings, and templates can be created for parts, assemblies, or drawings.
Creating part or assembly templates in SOLIDWORKS requires the same procedure. Drawing templates, however, require a little bit more work. In this blog, we will demonstrate how to create a sample part template, and additionally, how to modify File Locations in SOLIDWORKS to show the new template as an option in our New Document window. If you are interested in learning how to create a drawing template, refer to [insert “Drawing Templates vs. Sheet Formats” YouTube video and/or blog].
To begin, we will open a pre-existing part template and simply customize it. Items that can be customized include:
- The names of default planes and the origin
- Custom File Properties
- Hide/Show states of origins, planes, and sketches
- Document Properties
 |
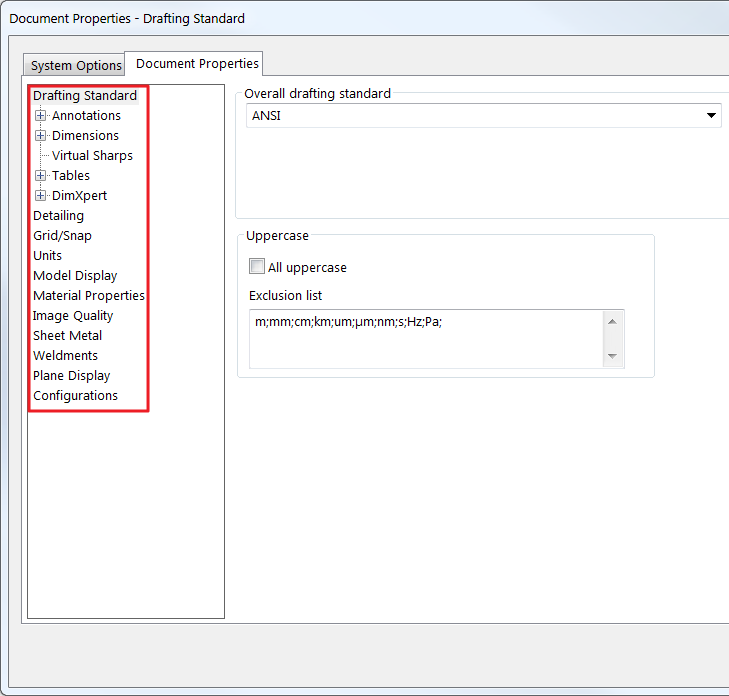
Navigate to Document Properties and change the drafting standard to ANSI, the units to IPS (inch, pound, second), and the precision to two decimal places. Then, change the Hide/Show items options (found on the Heads Up View toolbar) to display the default planes and hide sketch relationships. With these options modified, we’ll now save our part as a template for future use.
 |
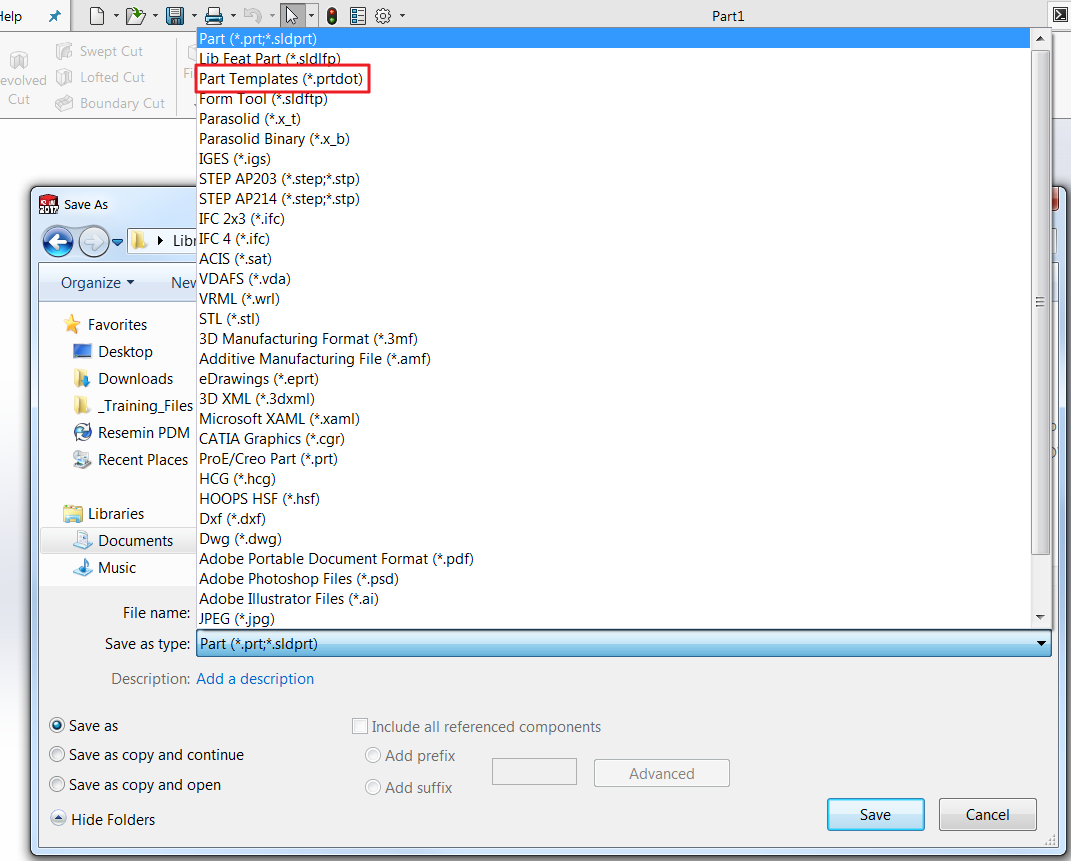
In SOLIDWORKS, choose File>Save As and change the file type to Part Template. By default, SOLIDWORKS will redirect you to the default folder for SOLIDWORKS templates. When saving templates or other custom data, it’s best practice to save to a folder outside of the SOLIDWORKS installation directory to avoid potential data loss when upgrading or reinstalling. For this example, create a new folder on the desktop called Custom and save the template there. Just like that, we’ve created our own custom part template.
 |
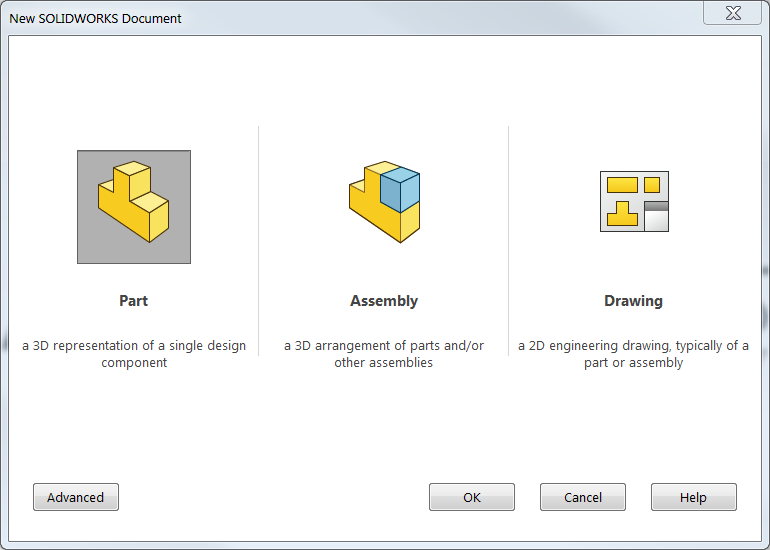
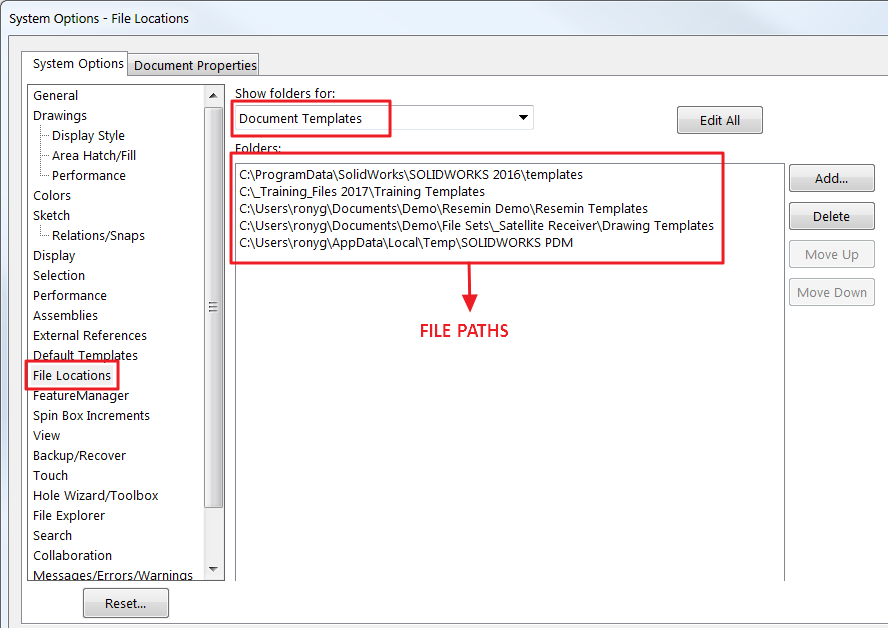
Now comes the most critical step; just because we have saved the template doesn’t mean it’s available in our New Document window. We now need to add the new Custom folder as a File Location in SOLIDWORKS so that it can display the template in our New Document window. This can be done by going to Options> System Options>File Locations. By default, the Show folders for dropdown is set to Document Templates (if not, use the dropdown window to select it). As seen below in Figure 4, the Folders window shows all the file paths for any existing tabs in your New Document window. To add a new file location, click Add… and browse to the location of your Custom folder. Once this file path has been added, click OK and now that template can be used.
 |
The template should now be displayed in a tab labeled Custom, the name of the new folder we created, and is ready for use. You are now capable of creating and using as many templates as necessary. Consider exploring custom templates further by changing different document properties to see what kind of options are available – you can even create templates with stock design work already completed.
For more information, check out our YouTube channel. get a SOLIDWORKS 3D CAD quote or contact us at Hawk Ridge Systems today. Thanks for reading!