
Creating a Bill of Materials for an assembly is nothing new. Traditionally, we may have used a program like Excel to create a table and manually fill out the rows and columns. This process would be very involved and would require constant editing when parts and assemblies are updated or changed.
Fortunately for us, SOLIDWORKS automates the process of creating and updating the Bill of Materials. You can add Custom Properties whenever a part is created or later in the part’s history. Those Custom Properties are automatically placed in the correct row and column in the Bill of Materials. Let’s explore how we go about this process.
Creating Custom Properties
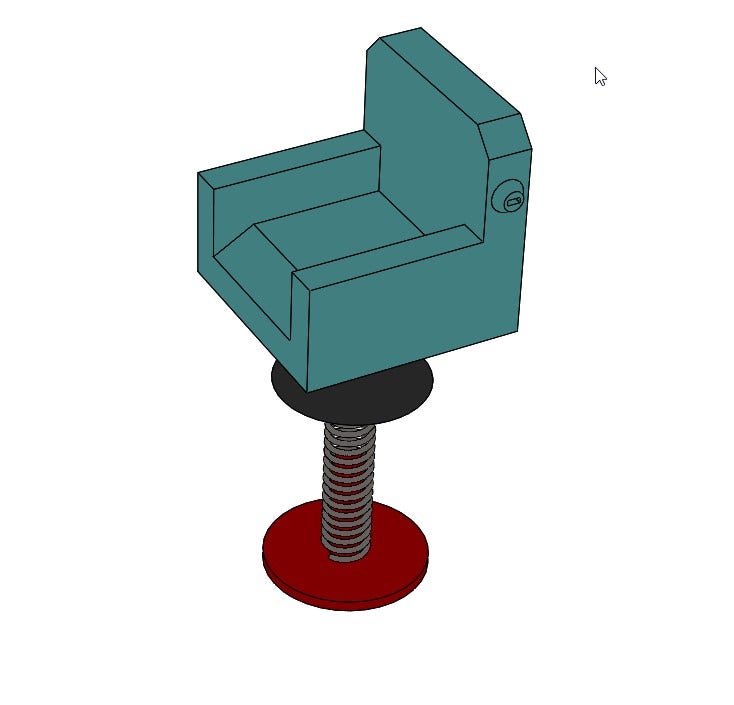
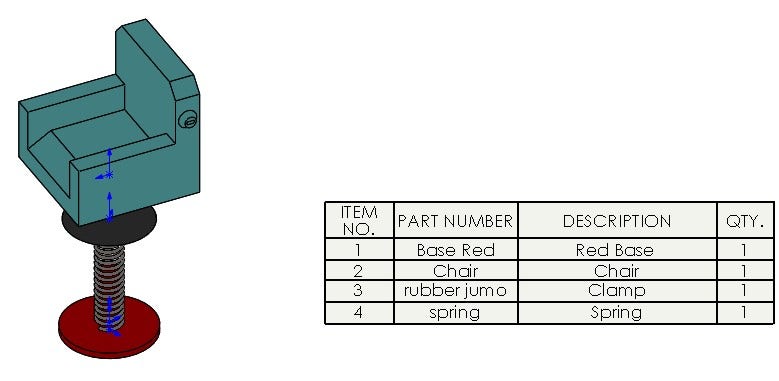
A toy has been created from different parts and is now inside an assembly environment.
Before the Bill of Materials is created, we are going to focus on creating Custom Properties for the red base, since the other parts have had their Custom Properties created already. It is also possible to add Custom Properties to a part after the Bill of Materials is created. Custom Properties are located in the Standard Toolbar under File Properties.
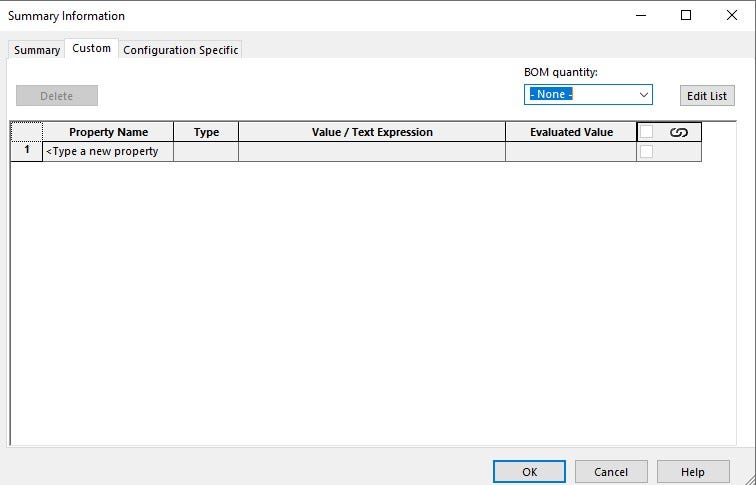
After clicking on File Properties inside the Red base part, we will be working with the Custom tab.
![]()
Each row has a Property Name, Type, Value/Text Expression and Evaluated Value.
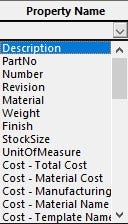
Let’s start by clicking on the Property Name. We can either type our own Property Names or click on the drop-down arrow and select one of the pre-made options.
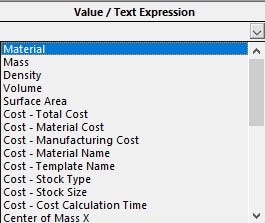
Next, Value/Text expression can also be typed in or selected from the property list.
Click Enter and the value appears in the Evaluated Value column. By using this process, the custom properties Description, Material, and Weight can be created for this part.
Adding a Bill of Materials
Now we can go back into the assembly environment and create a Bill of Materials. You can find the Bill of Materials inside the Assembly tab on the Command Manager. We don’t need to type in the description because it auto-populates in the Bill of Materials.
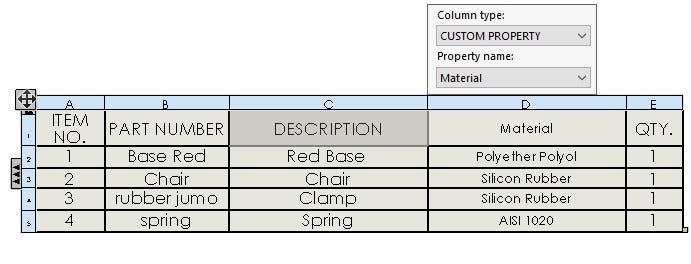
Next, we will add a column by right clicking on the Description Column, then clicking insert in the right-click menu and then selecting Column Right. Once the column is added, SOLIDWORKS gives the option to choose what property the column will display. Here we have chosen to add a Material column.
Custom Properties make creating Bill of Materials simple. We can create Custom Properties and have the Bill of Materials auto-populate. If a property such as the material is changed in the part it will update the Custom Property in File Properties and have it update in the Bill of Materials as well. Custom Properties can be saved in file templates if needed. You can also create and update them in SOLIDWORKS PDM. If you have any tips or tricks on the Custom Properties please let us know in the comments!
For more information on SOLIDWORKS or if you have any questions, contact us at Hawk Ridge Systems today. Thanks for reading!


