How you import your SOLIDWORKS assembly into SOLIDWORKS Visualize matters! This blog and the companion video compare the two most common import methods and provide some time-saving tips.
Importing SOLIDWORKS Assembly into SOLIDWORKS Visualize

First let us examine the Export Simple option when exporting from SOLIDWORKS, which is equivalent to using Appearance grouping when importing inside Visualize.
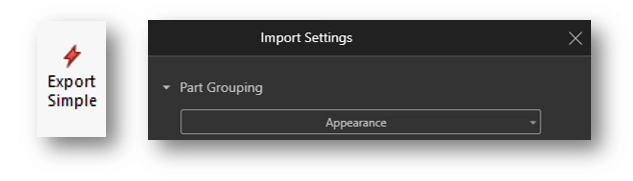
This creates a Visualize project where the model is brought in and grouped based on its appearances. This means that when dragging in a new appearance, all components that share the same appearance will update automatically.

This can be a great time saver if you need to try many different color variations! Appearance grouping also tends to have the best performance in situations where there is a very high part count.
Having all the components grouped by their appearance though can be a downside in certain situations, especially if you plan on: posing/repositioning the model in Visualize, creating an “exploded view” within Visualize, or creating an animation.
To move components independently with this grouping, you will probably need to use the Split Part command to break them into separate pieces – which is extra work. Finally, this import mode does not support Monitor file to enable live CAD updates, nor can the model be easily updated manually.
With this in mind let’s look at the Export Advanced option from within SOLIDWORKS, which is equivalent to using Automatic grouping when importing inside Visualize.
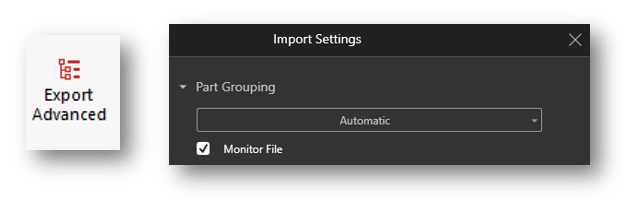
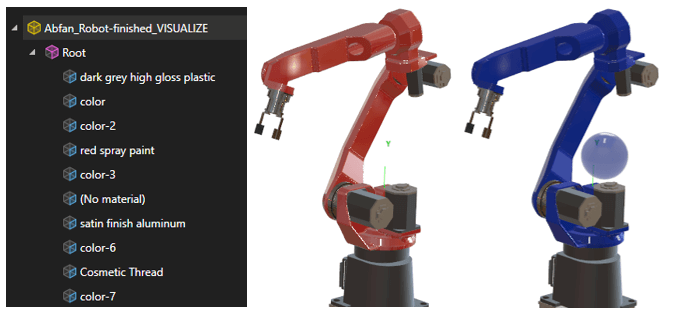
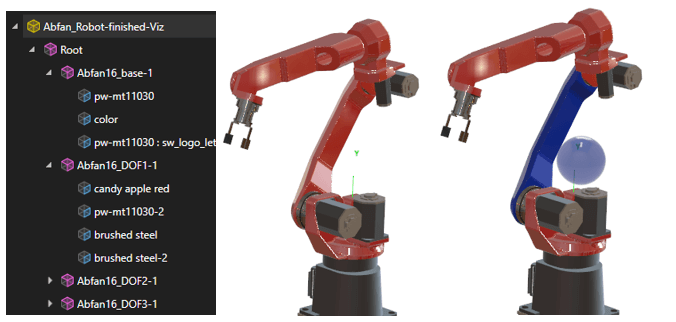
This mode allows live monitoring of the CAD file as well as manual updates. It also produces a model tree structure much closer to the Assembly tree in SOLIDWORKS.
If you’re thinking “there must be a downside” … it’s that new appearance dragged in will only affect the individual component. This means a few more clicks to update the appearances across the model, but thankfully there are some great time-saving shortcuts to help mitigate this.
You can quickly Copy and Paste appearances in the graphics area by Shift + Left clicking the part with the appearance you want to copy, then Shift + Right clicking the subsequent parts. This is my preferred method when applying a new appearance to a handful of components.
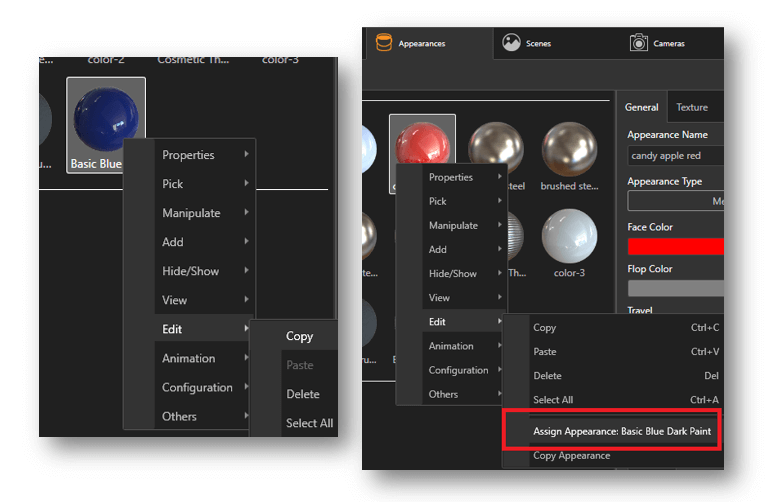
If there happen to be many components to propagate appearances too, then I would recommend the following workflow. Drag in the appearance to one component. Then, on the “Appearances” tab Copy your desired appearance. Right-click the target appearance that you want to replace and use Assign Appearance. This will remap all components with that appearance to the one you currently have copied.
Using these shortcuts, appearance adjustments can be done very quickly even with Export Advanced / Automatic grouping mode. For this reason, it is my default import method since it offers additional flexibility if I want to pose or animate the model, as well as the ability to update the model down the line.
It’s worth remembering though that “Simple” mode has its benefits. Using Export simple / Appearance grouping makes it incredibly simple to test color schemes quickly. If you combine this with Easy Mode (press Spacebar to activate) then even a complete novice can cruise through the process of testing color combinations.
Have questions? Contact us or get started with a free trial of SOLIDWORKS Visualize.