The new SOLIDWORKS PDM 2018 is packed with enhancements, but one of the most interesting is the revision table integration. Gone are the days of workarounds to both update the revision table in SolidWorks and to limit the amount of rows on that Revision table.
This exciting new feature will let you:
- Read and write values from or to a SOLIDWORKS revision table.
- Configure SOLIDWORKS PDM variables to automatically add information such as revision date, description, and approver to a new row in the table or to update the last row.
- Change the mapped variable values in the file’s data card, the values in the table are updated and vice versa.
- Updated automatically the revision table row by using 2 methods:
- Set variable transition actions, and
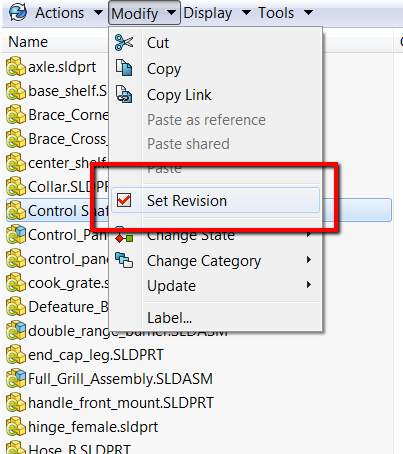
- Set Revision command.
Let’s take a look at this new feature and how we can make it work.
Configuring the Revision Table Node
There is a new tab in the PDM Administration tool called SOLIDWORKS and it contains both the TOOLBOX as well as our new feature REVISION TABLE.
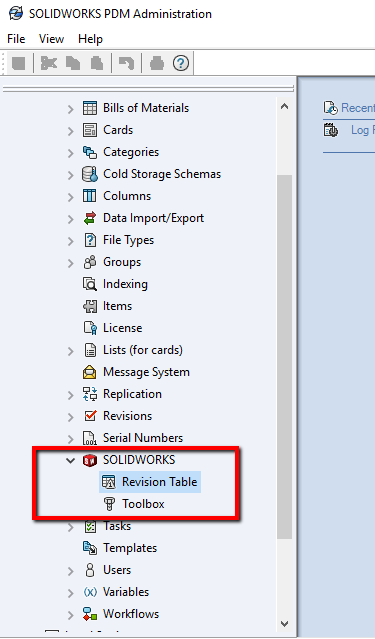
The REVISION TABLE feature is where we will enable the integration as well as setting the amount of rows for that table. If manual rows are created in the drawing we can choose a sign ( *, -, etc) to be set before the revision is incremented.
- Check Enable Revision Table box
- Set amount of rows
- Write a revision placeholder character(s)

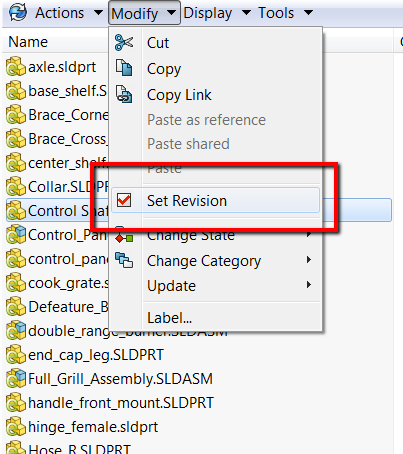
If you are setting the revision manually, there is the option to enable the Set Revision command to update the revision table
- Check Update Revision Table in SOLIDWORKS Drawing through “Set Revision” Command
- Check Revision table column(s) that you want to update in the Revision Table
- Input a static or dynamic value
- Select the PDM variable that will be used
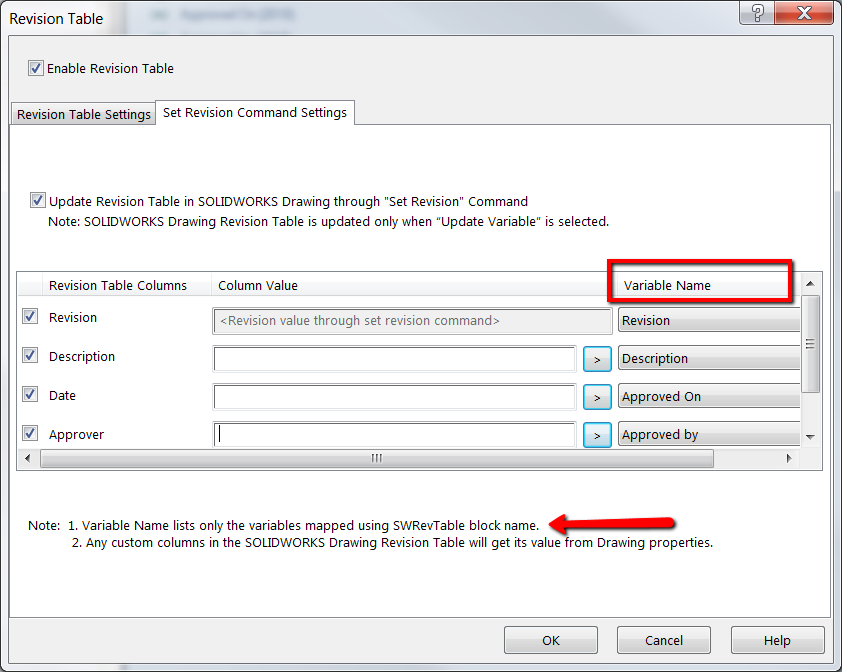
*The variable name list in this tab will only display the variables mapped with the SWRevTable Block name.
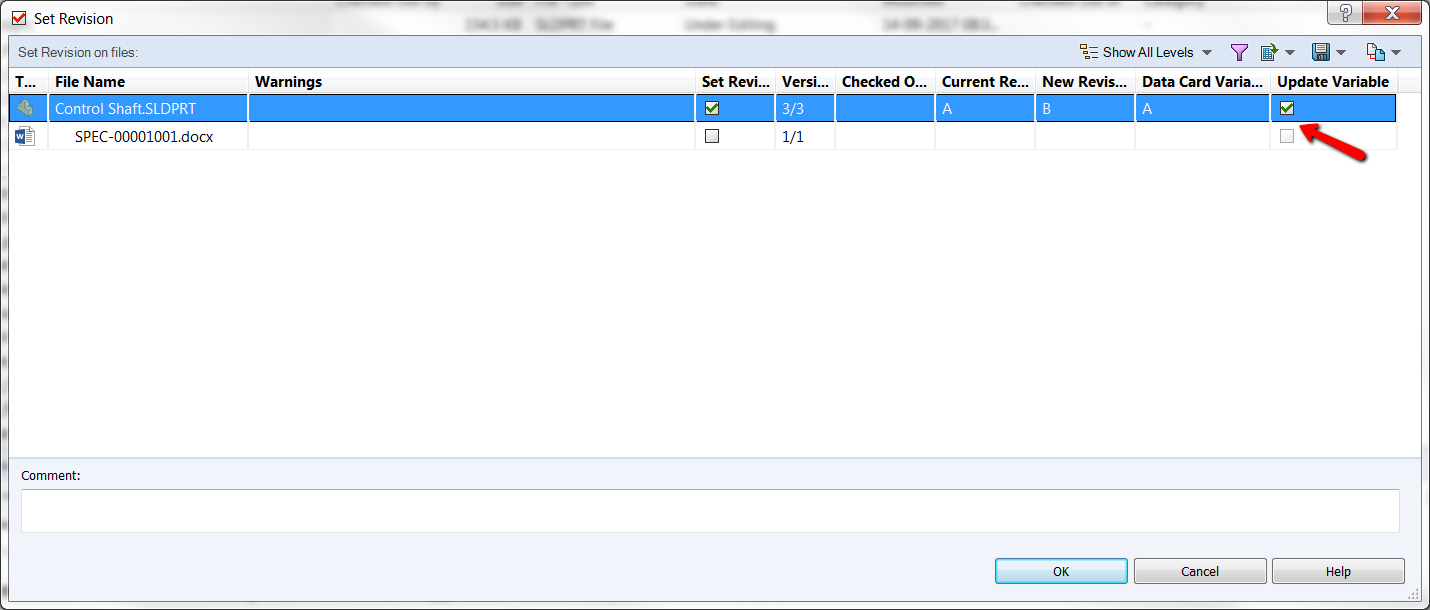
Please note that when using the SET REVISION, it will only update the revision table if the “UPDATE VARIABLES” is selected in the set revision window.
Defining Variable Mapping
A new Block has been created for this specific integration. The SWRevTable will be added to the appropriate PDM variable attribute in order to have this bidirectional relation with the revision table which would only apply to the SolidWorks drawing.
- In ADMINISTRATION tool, open the VARIABLES tab
- Select the variable to update
- Write SWRevTable to BLOCK NAME
- Set ATTRIBUTE NAME
- Write slddrw to FILE EXTENSIONS
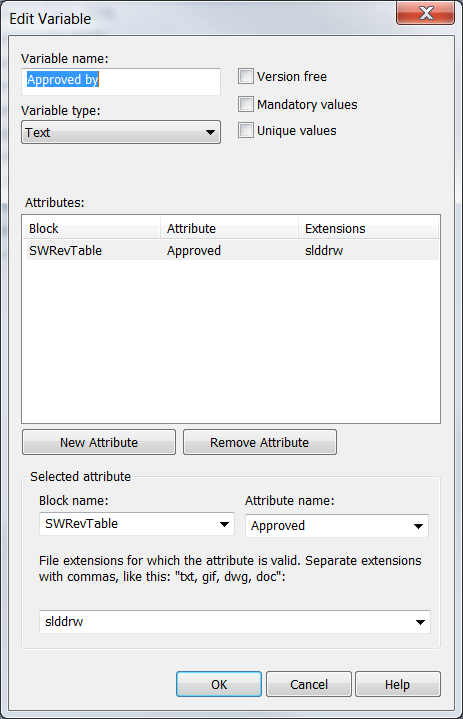
*If the variable doesn’t exist, create a new variable and add the attribute. Also, always make sure those variables are in a control box on the drawing datacard you are using.
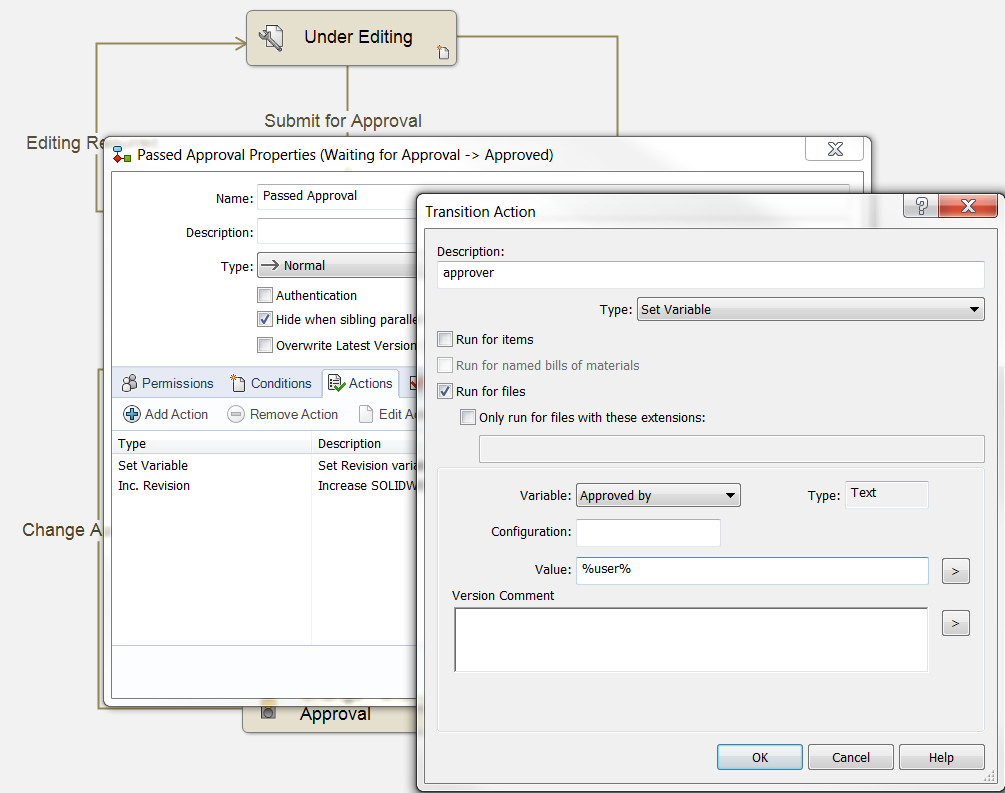
Finally, the workflow is where we can add some transition actions to set our variables. This example is adding a transition action to set the approver with the user making this transition.
- In ADMINISTRATION tool, Expand the WORKFLOWS tab
- Open the appropriate workflow and select the transition where you want the table to be updated
- Hit ADD ACTION
- Use SET VARIABLE and choose the variable to be updated with a fix or dynamic value to populate it.
With this new revision table integration set up, you are ready to update automatically the revision table in SOLIDWORKS with the workflow or manually with the SET REVISION action.
For more information, check out our YouTube channel, get a SOLIDWORKS PDM quote or contact us at Hawk Ridge Systems today. Thanks for reading!
