


Dispelling Firewall Ports
When we work collaboratively over the network, we must make sure that the required ports for communication (between the clients and the server) are open. Unless those ports are open we cannot use the SOLIDWORKS Licenses we need to do our jobs.
Insert analogy here: We must drive to our destination, on our way there we run into a blocking toll booth. The toll booth has residing in itself the toll collector. We pay this toll collector and continue through this toll booth. Via this road and our vehicular transport we reach our destination.
Key for the above analogy:
We = SOLIDWORKS user
Destination = Server
Road = Port
Toll Booth = Firewall
Toll Collector = IT (Information Tech)
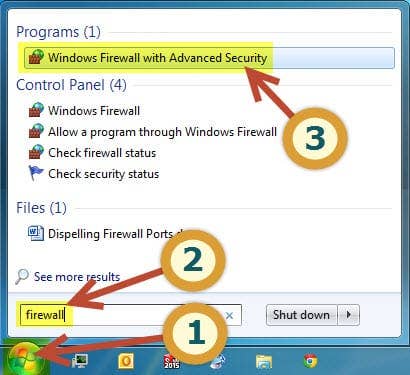
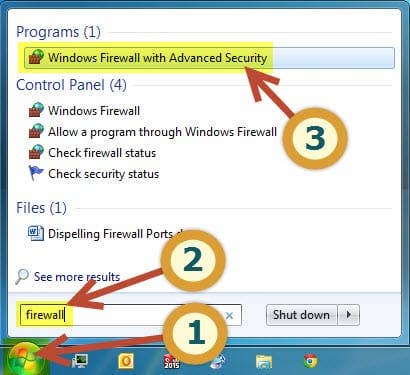
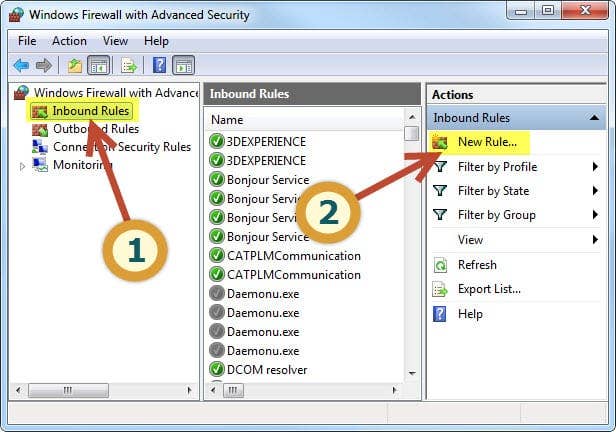
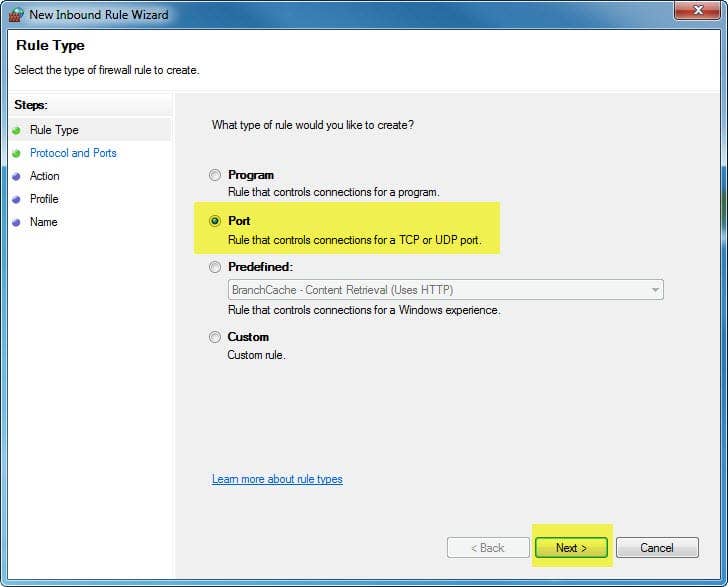
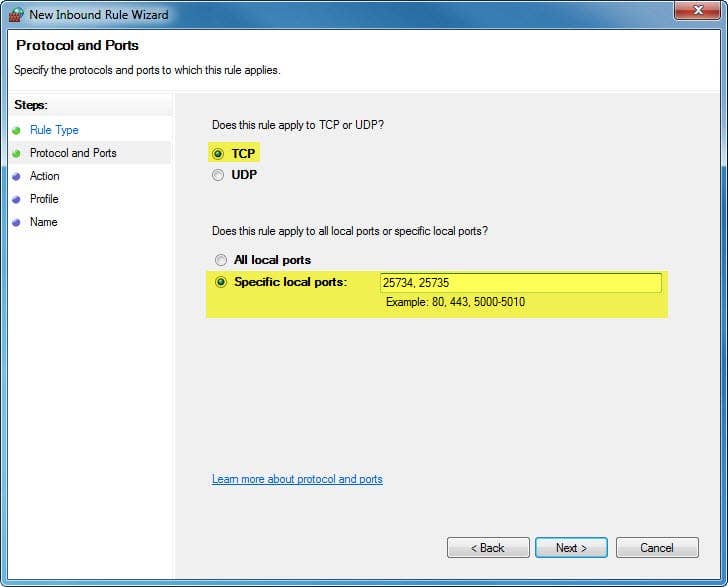
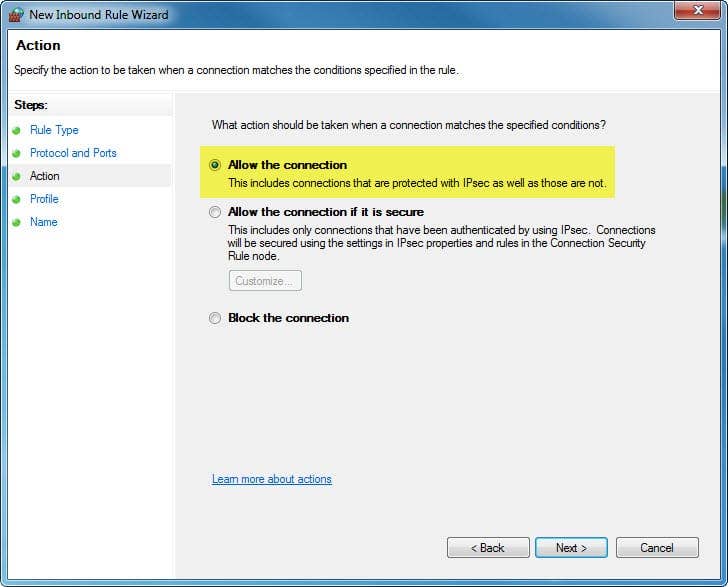
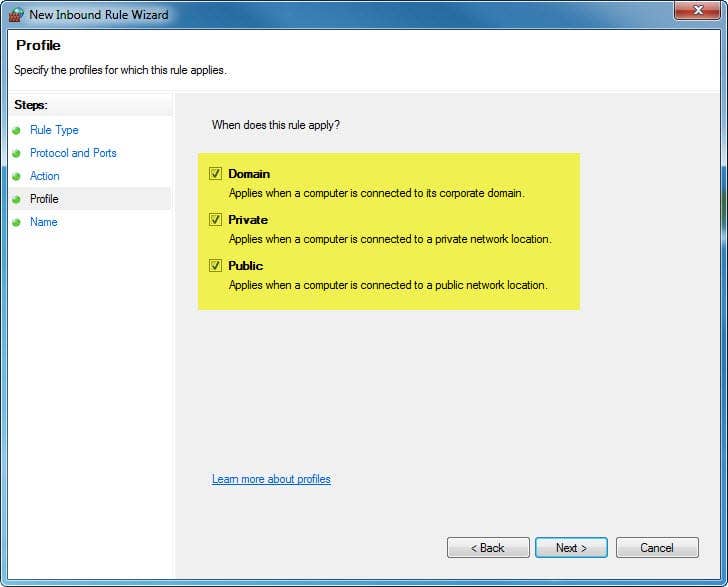
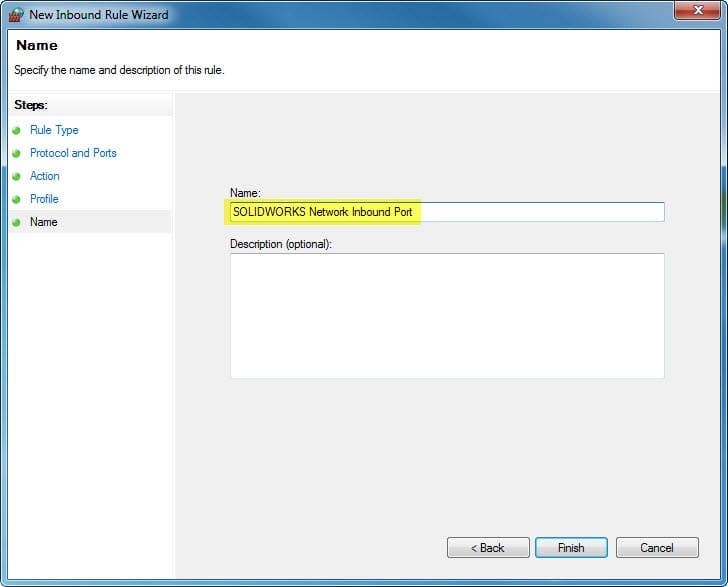
Launch Firewall Tool(s) § Go to Start > type in Firewall > select Windows Firewall with Advanced Security (easiest) or Go to Start > Control Panel > Windows Firewall > Advanced Settings Searching firewall in the Start menu opens Windows Firewall with Advanced Security to begin. § On the left side click Inbound Rules. Now on the right side click New Rule… Clicking New Rule under Inbound Rules starts the wizard for opening a SOLIDWORKS port. Firewall Rule Wizard § Rule Type: Now we’re within the New Inbound Rule Wizard, select the radio button Port. Click Next. Selecting Port as the rule type moves the wizard on to specifying protocol and port numbers. § Protocol and Ports · Select TCP · Select Specific local ports: Open the specified ports per what you need. § SOLIDWORKS Network: 25734, 25735 § SOLIDWORKS Electrical: 1433, 1434, 26666-26672 § Enterprise PDM: 1433, 1434, 3030 · Click Next. Setting the firewall rule to Allow the Connection is a key step in opening the needed protocols and ports. § Action: Select the radio button Allow the connection. Click Next. Allow the connection is chosen here before enabling the rule across all three network profiles. § Profile: Select all of the checkboxes; Domain, Private, and Public. Click Next. Checking Domain, Private and Public profiles applies the rule no matter how the PC connects. § Name: This doesn’t need to be anything specific, but I’d advise something like; SOLIDWORKS Network (or Electrical or EPDM) Inbound Port. Click Finish. Naming the rule SOLIDWORKS Network Inbound Port finishes it, then the steps repeat for Outbound Rules. Lather Rinse Repeat § Do it all over again, except for the Outbound Rules. The Lather Rinse Repeat heading signals that the firewall setup steps above should be repeated as needed. I would like to thank Dennis Calvert for letting me use his art for my teaser picture. Here is a link to his Deviant Art gallery and account: http://dennis-calvert.deviantart.com/

Put your next design into motion
Explore solutions and expert guidance for your application.
Ask an Engineer