Since SOLIDWORKS Inspection was released in April of last year, the number one
topic of technical support calls has been custom report templates. Whether the
issue relates to getting attributes to map properly or making every
characteristic fit in the table, there are several tricks I have learned that
can make template creation pain free. Follow these steps on the next template
you generate for Inspection.
-
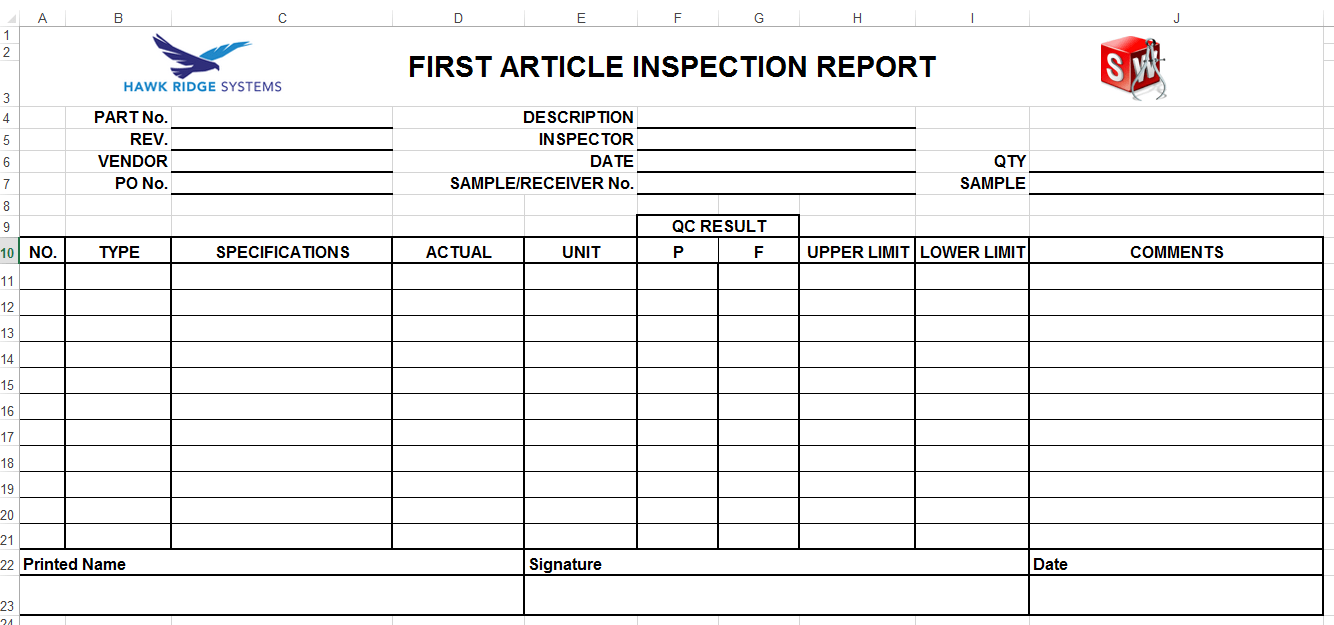
Start by making a simple Excel workbook with the format you want in your
report. If you want multiple pages in your report for a title page or bill
of materials make sure to add them at this point, otherwise, delete unused
sheets from your workbook.
Lay out your table with cell outlines, headings, color fill, and any logos you
want. There is no need to create 100 repeated characteristic rows, 5-10 should
work to give an idea of what the table will look like.

-
If you plan to use any formulas or Conditional Formatting now is a good time
to add them. For example if you want to have your results text change color
based on Pass/Fail criteria you would use Conditional Formatting with a rule
checking that the result value is between the upper and lower limits. -
Define a footer row for each table that will be populated with a list of
values, such as the characteristic table. This is done using the Excel Name
Manager and allows SOLIDWORKS Inspection to expand or truncate the table to
fit all of the items in that list, hence why we only needed a couple of rows
in our template. For more information on how this is done take a look at the
Hawk Ridge Systems Knowledge Base for the document Inspection Report Footer
Rows.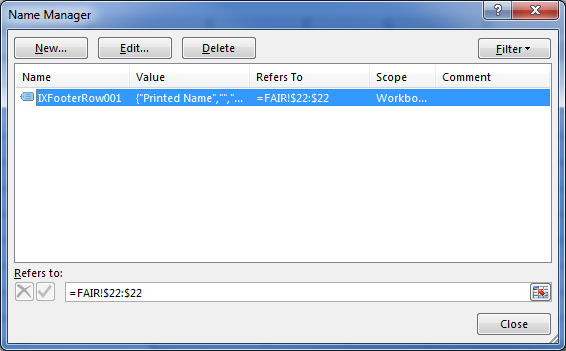
-
Once your workbook has all of the desired formatting, it’s time to save it
as an Excel Template. There are a couple of tricks to this:
If you plan to use both the Standalone and Add-In versions of SOLIDWORKS
Inspection, you will need to create two copies of the template since they use
different strings to map the attributes.
“Specification” from Standalone:
iex:INSPECTIONXPERT/INSPECTION_SHEET/ATTRIBUTES/ATTRIBUTE/@Nominal
“Specification” from Add-in:
iex:INSPECTIONXPERT/SAMPLE_SHEET/CAD/ATTRIBUTES/ATTRIBUTE[@selected=’True’]/@value
I recommend creating a folder for your custom templates outside of the
default directory. Inside this main folder create subfolders for the Add-In
and the Standalone tools. I save a copy of my report template in the
appropriate subfolder using a suffix for the version. (i.e.
HRS_FAIR_Standalone & HRS_FAIR_Add-in)
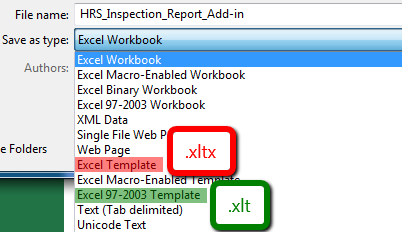
The next import thing is the file extension you use. The SOLIDWORKS
Inspection Template Editor will only open Excel Templates (.xlt) However, if
you are using any version of Excel newer than Excel 2003 (which you should be
considering SOLIDWORKS 2014 does not officially support anything prior to
Excel 2007 and SOLIDWORKS 2015 dropped Excel 2007 as well) the default Excel
Template extension is .xltx. So you will need to use the Excel 97-2003
Template option when saving your workbook as a template.
-
Now you are ready to use the SOLIDWORKS Inspection Template Editors, that’s
right two of them. You will need to map the attributes to your templates
using the Template Editor from the tool version you plan to use that
template for. Meaning only use the Template Editor from the Standalone tool
for your Standalone template and the Add-In Template Editor for that
template.
The mapping is pretty straight forward, select the cell you want first then
select the attribute you want in there from the list and click
Insert. Some tricks here, start on the right side of your
sheet and work left. Excel lets long strings that overflow from the cell
continue over other cells that do not already have values in them therefore
you will have a hard time selecting a cell in column B if the string in column
A is covering it. Also, you only need to map one row worth of attributes in
any list, SOLIDWORKS Inspection will do the rest.

-
When you are done mapping, click Finished. Be sure to put
the template back in your correct folder since the Template Editor will try
and trick you into putting it in the default location. -
Create or open a project to test out your new template. Choose
Export to Excel, then click the green plus sign to add your
new template to the list.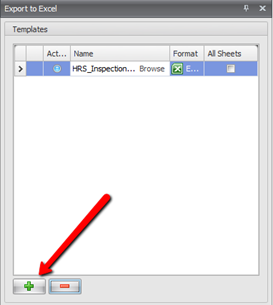
The list of templates is saved with the project, so if you want that template
to always be an option without adding it each time you need to update the
Project Template you use to include your custom Report Template. Click
Export.
Bask in all your hard work, you have created a custom template for Inspection
reports!
This might seem like a lot to condense into a short blog, so I made a video as
well, actually three. Take a look at the Hawk Ridge Systems YouTube channel
for the three part video series on creating SOLIDWORKS Inspection report
templates where I walk you through these steps and show you how it’s done.