I was asked if I could take the surface area of selected faces in SOLIDWORKS and have that value be referenced in a drawing file. When this problem first came across my desk I assumed it was going to be an easy task, but boy was I mistaken.
My first thought was using the SW-Surface Area Custom Property, but that calculates the entire surface area of the part. My next idea was to create a surface body of the selected faces, isolate it in its own Configuration, and then use the SW-Surface Area Custom Property. After that experiment, I quickly recalled that the SW-Surface Area Custom Property ignores surface bodies. My next hope was to create a measurement sensor of the selected area and link that to a Custom Property.
Creating a Measurement Sensor
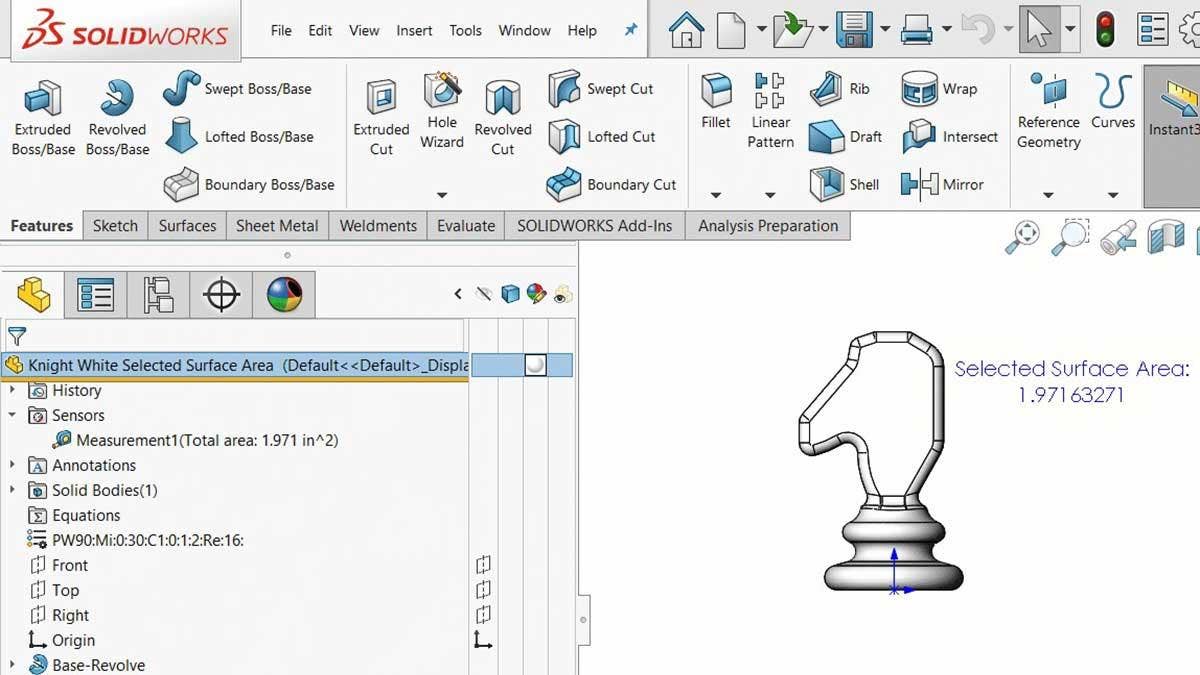
A measurement sensor can be created in two ways: from the sensor Property Manager or from the Measure tool. With both workflows, the sensor is created after selecting the desired faces and then clicking the Create Sensor button within the Measure Tool.
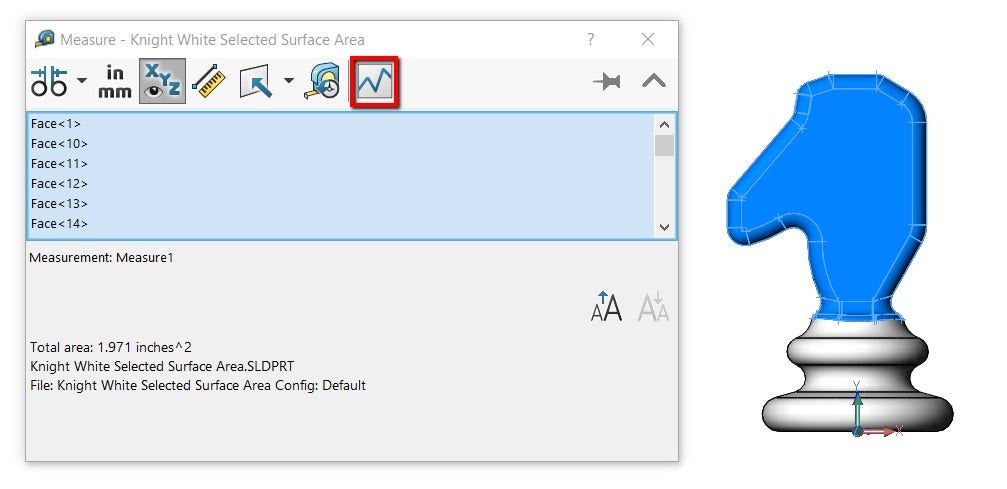
This will create a sensor that is visible in your Feature Manager Design Tree and will update live as your geometry changes.
![]()
My plan was to then link this sensor to a custom property and then voilà, problem solved. Unfortunately, I was wrong again – you cannot link a sensor to a custom property, no matter how hard you try. At this point, the easiest solution would be to write a macro to solve this issue using the SOLIDWORKS API functionality. This was out of my wheelhouse, but easily doable by the HAWKWARE team here at Hawk Ridge Systems if you want the easiest solution to this problem. If not, keep reading for the not-so-slick workaround I created for this.
Making Custom Properties
To create a custom property from a selected area, you have to follow the following seven-step process.
Create a New Configuration
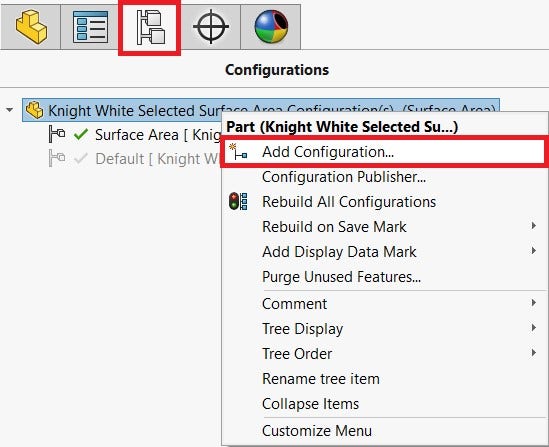
The first thing I had to do was create a new configuration where I will isolate the faces I want to select for the custom property. You can create a new configuration from the Configuration Manager by right-clicking the part and selecting Add Configuration, as seen in the graphic below.
Make a Surface Body
Once that configuration is active, we need to create a surface body of the desired faces we want the surface area for. This can be done using the Knit Surface command.

After you knit those surfaces you will have a solid body and a surface body in your part model.
Deleting the Solid Body
The next step is to use the Delete Body command and delete the solid body. This can easily be done by right-clicking on the solid body and selecting Delete/Keep Body from the menu.
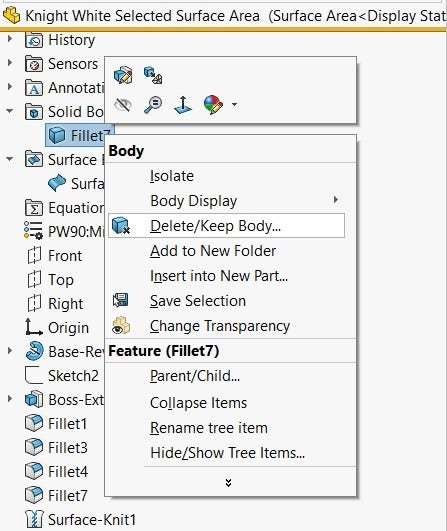
Once the solid body is deleted you are left with only a surface body.
Using the Thicken Command
Our next step is to make the thinnest possible solid body from this surface body of our desired faces. The Thicken command will do just that. The goal of this step is to create the thinnest body so we can assume the surface area created by the thickness is negligible when we think about significant digits. For this example, I could get away with 0.00004 in, but the smaller the better. The value you can actually use will depend on your geometry and units and remember SOLIDWORKS smallest feature can be 1e-7 m so don’t start any smaller than that.
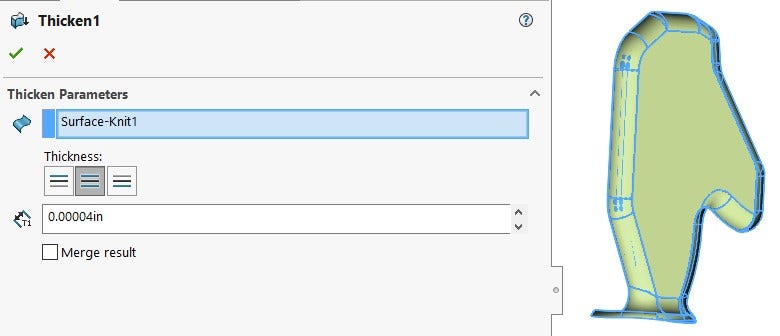
Once thickened, the surface body will become a solid body and if you got a small enough value it should look like a surface body when viewed macroscopically.
Create a Configuration Specific Custom Property
The next step is to create a configuration specific custom property for this configuration. This can be done in the File Properties window of the part file under the configuration specific tab. I decided to call this property “DSA” for “double surface area,” but the name does not matter, just ensure you know what it is. For the value, you want to select SW-Surface Area.

This “DSA” custom property is double the surface area we actually want assuming the sliver faces contribution to the total surface area is negligible.
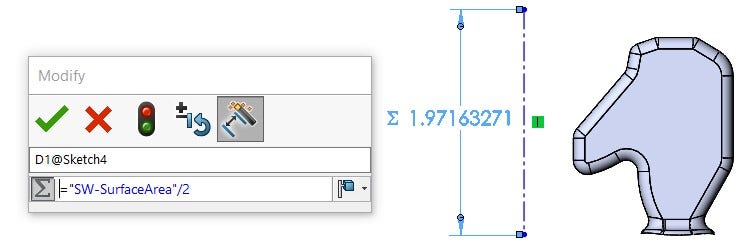
Dimension the Line
Our next step is to divide this number by two. Unfortunately, functions cannot be expressed in file properties so we need to create a dimension to do the math in. An arbitrary sketch with an arbitrary sketch line will be created and the dimension of the line will be set to “DSA/2.” This dimension value is going to be the driving force for our desired surface area value. You can also reference the SW-Surface Area within the dimension bypassing the need for the configuration specific property.
Create a Custom Property of Dimension Value
The results of the dimension should be the surface area of our selected faces, so the final step is going to be to create a custom property the reads this dimension’s value. The final custom property can then be referenced in a drawing file and be fully associative to minor changes that do not completely remove some of the selected faces. Since the custom property is created in the custom tab it will be available for all configurations.

Now that we have created this custom property, let’s compare it to the sensor value. Both read 1.97 square inches but start to slightly deviate after that due to rounding. Opening up the dimension gives you an unrounded value that matches even closer.

And finally, this video will show the associativity of this method. In order for the custom property to update, both configurations have to be rebuilt. It’s a little clunky, but it gets the job done. Of course, if you don’t need an associative custom property you can always copy the value from the measure tool and paste it wherever you would like it or get a macro to do exactly that.
For more information on SOLIDWORKS or if you have any questions, contact us at Hawk Ridge Systems today. Thanks for reading!


