This is the final blog in a 5 part series for the Top 5 Things You Should Know
About
SOLIDWORKS Composer. It covers publishing images and compiling them into a completed
publication. The entire video series can also be found on
our YouTube site.
Publishing Images:
Publishing images seems like it should be a super simple task – and it really
is easy, but I put it on the list for good reason: it’s really, really
important. Understanding how to correctly publish images and link them with
various deliverables is critical for the entire operation. If you don’t “get”
publishing images, the whole thing can fall apart.
The idea here is that we are exporting all Views from Composer as
images. These images can be overwritten by Composer at any time. Composer is
linked to the original SOLIDWORKS CAD files, so when the SOLIDWORKS models
update, so will the exported images. This means anything that links to these
images is also automatically updated.
Here’s the process:

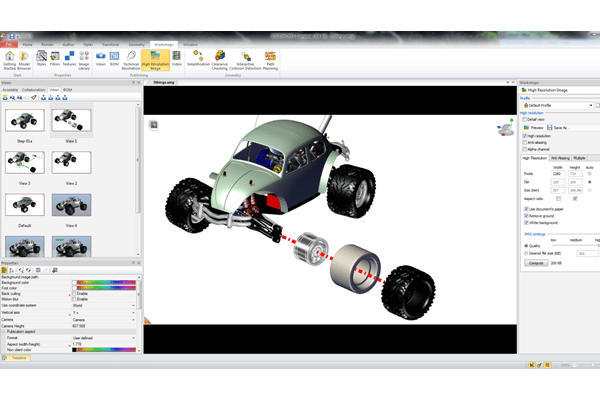
Views are made in SOLIDWORKS Composer. Once all Views look
the way you want them to, it’s time to publish out the images. To do this, go
to the Workshops tab and select High Resolution Image. Set
the resolution you want and then click on the Multiple Tab.

In the Multiple tab, select Views. This will trigger all the
Views in the document to render simultaneously to a desired location.
It’s important to note that the naming structure of these images use the
Document Name and the View Name, so name your
Views before exporting images to avoid update issues later on.

Hit Save As and point to the directory where you want to render all the
images. Click Save.

All of the images will automatically render to the location.
Now here’s where the important step comes in: we want to keep these images
associated back to the original CAD files, so it’s important these images are
not embedded into any documents. Instead, you want to link to the images so
that the final deliverable updates with the published images.

To do this I typically create a Word document and insert a table. The table
gives you a location to put the images.

In the table choose Insert and Link an image. Note: be careful not to
select Insert as this will break the link back to SOLIDWORKS.

And there you go! It’s just as easy as that. You’ve an end deliverable that
links back to the original SOLIDWORKS model. When Composer is updated later,
simply re-render all images using the High Resolution Workshop over
the originals and the Word document will update.
Read all of the blogs and watch the videos in this series: